12. Entering Media through ISBN/ASIN in MediaLibrary 3.5.x Shop
In this article we will be looking at the Media Manager in MediaLibrary 3.5.x Shop, and specifically at how to enter a Media's ISBN/ASIN and retrieve the Media's information from Amazon with that.
Now that you have created categories, you can start entering Media into MediaLibrary 3.5.x Shop.
You can enter Media in 3 ways inside MediaLibrary:
- through ISBN/ASIN (retrieving the Media information from Amazon)
- manually, entering all Media info by hand
- to use MediaLibrary to enter eMedia
We will cover these methods in the following articles, but now we start with the first.
Entering Media through ISBN/ASIN and fetching info from Amazon
Entering Media through ISBN/ASIN is the easy way, as all Media details will be retrieved from the Amazon database you choose in Configure Settings.
Go to Component -> MediaLibrary -> Media
Once you hit the [New] button, you will be presented with the Media editing screen.
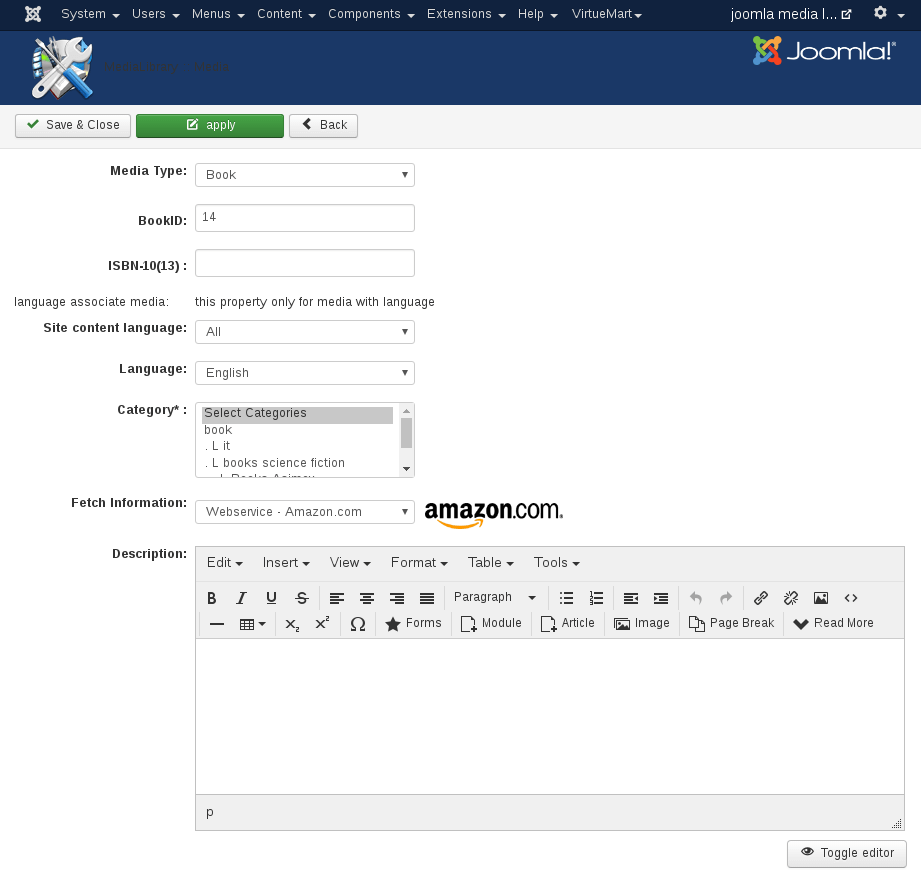
In the next article on manual Media entry we will have an explanation of the various entries shown in the New Media screen, but for entering the Media details through ISBN/ASIN only the first two (MediaID and ISBN/ASIN) are of importance. All other details will be pulled in from Amazon. Easy!
Flow for ISBN/ASIN Media entry
- Enter the Media's ISBN/ASIN
- Select an Amazon host
- Select a category
- Save the Media
- Repeat this for as many Media as you want to enter
- Select those Media in Media Manager (the Media will still be unpublished)
- Click the [Refetch Information] button on the top bar
- Confirm the Amazon host you want to fetch from, or change your mind about which one in the next screen. Then click [Refetch Information] again
- You will see a results screen letting you know how the information fetching
-
Now select each Media, edit the
description, and do not forget to set
the
Information from: field to
On your own.
This will Stop your edited entry from being overwritten by new information fetching, which would otherwise be performed at each page refresh.
Save the Media. - Select the newly entered Media and publish them.
Explanation of the fields and actions needed
-
MediaID
This is the MediaID for your internal reference. Fill in your own internal MediaID here if you have set the option in Configure Settings for Auto-increment MediaID to NO. If you have set that option to YES, you do not need to bother with this field.Tip about internal reference IDs (MediaIDs):
To make it easier for your internal administration, it is a good idea to use a numeric prefix for certain categories, for example all Media in the category "Joomla Media" will have their MediaID preceded by "01", all Media in the category "MySQL Media" will have their MediaID preceded by "02", etc.
Then you can choose how many numerics you want to assign to Media, so you end up with MediaIDs like this for Media in the "Joomla Media" category: 01001, 01002, etc. You can also use the MediaID field for indicating shelve storage location, or anything else you require. -
SBN/ASIN-10 (13)
This is the ISBN/ASIN-10 or ISBN/ASIN-13 Media number. ISBN/ASIN-10 will always work, from any Amazon site. ISBN/ASIN-13 will work reliably from Amazon CA, COM, UK.Tip about searching ISBN/ASIN numbers:
Almost every Media has a unique identification number, called ISBN/ASIN (International Standard Media Number). The ISBN/ASIN is internationally used to identify Media, and we will use it to pull in the Media details from Amazon. A lot of Media sites and libraries will show you the Media's ISBN/ASIN number, so look that up first before you enter a new Media.
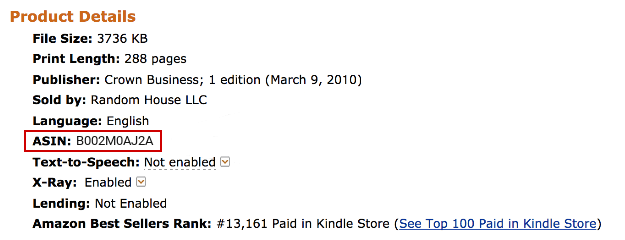
For example, on Amazon you can find the ISBN/ASIN-10 or ISBN/ASIN-13 Media number under Product Details for each Media. Just go to the Amazon website of your choice, use the Search function to find your Media, and then look in the Media description for Product Details. See the example below:
About ASIN:
MediaLibrary Software only supports ISBN/ASIN, ISBN – for Books, ASIN – for video, games and music for good reasons:
- Media libraries will use Media catalogued on ISBN/ASIN
- ASIN is Amazon only (in fact, ASIN stands for Amazon Standard Identification Number), and not all people want to use Amazon
- ASIN permits other products besides Media, which would cause all kind of problems inside the MediaLibrary interface (other fields necessary in the tables for the details of the product, resulting in incompatible database fields)
Steps by screenshots
Now that you have your Media's ISBN/ASIN, fill it in. Choose the Language of the Media, the Category where Media will be in, and in Fetch Information choose an Amazon website you want to retrieve the details from. When you finished save your new Media entry.
You will see that the Media are there, but unpublished and without details. So, now we are going to fetch the Media details from Amazon. Select the Media you want to fetch information for (select by checkmark).
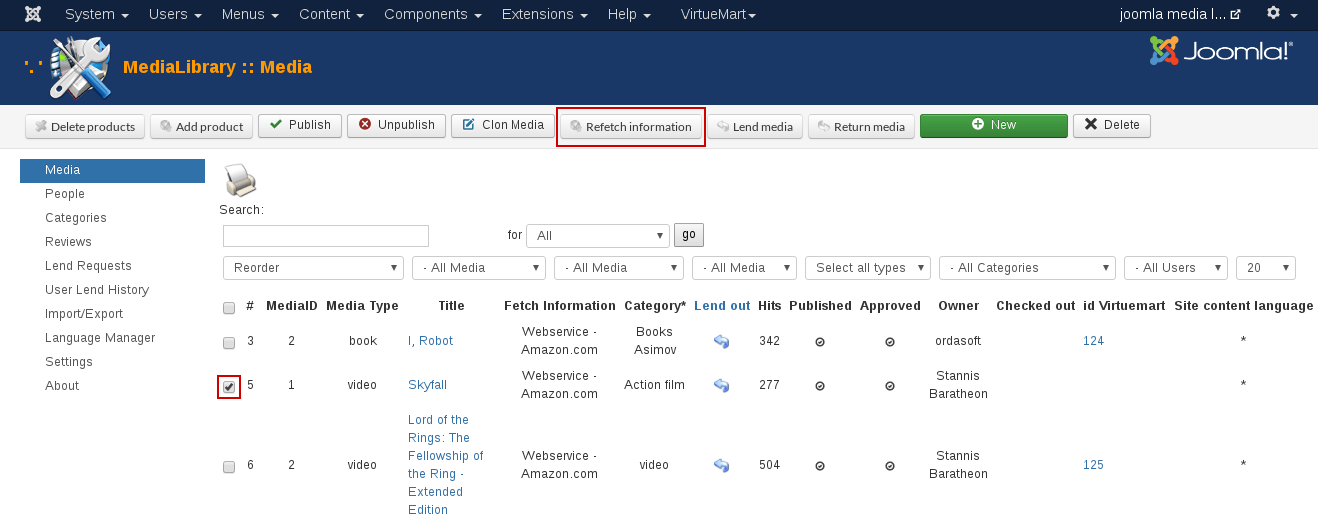
Now click the [Refetch Information] button on the top bar. You will see the following screen:
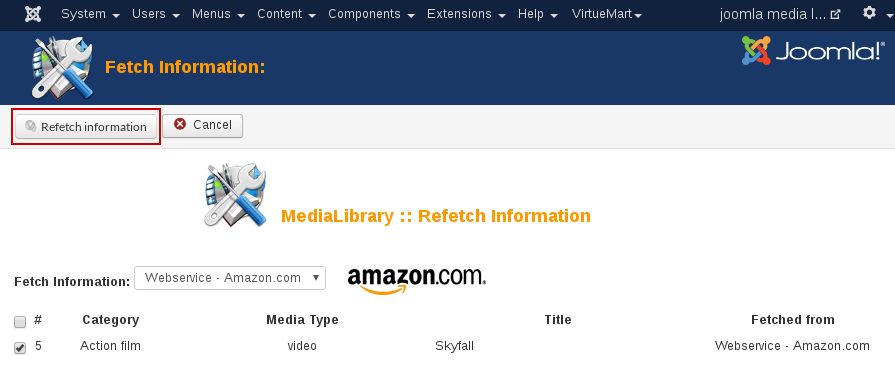
This screen is just a check for you to be able to change your preferences if your want. It presents the default settings which you entered in your configuration. If you want, you can change the server you want to retrieve the details from.
If you don't want to change anything, just click the [Refetch information] button on the top bar again.
MediaLibrary will show you the results of the fetch action in the next screen:
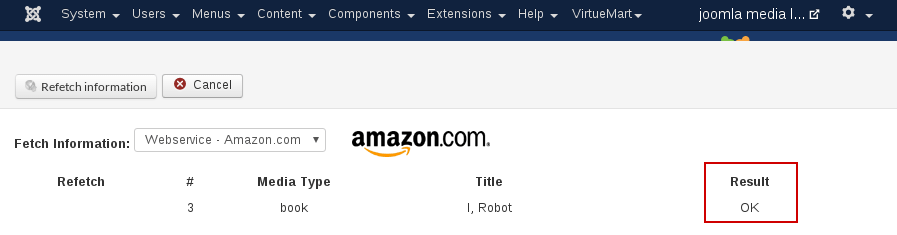
If everything is OK, click [Cancel] on the top right. You will be returned to the MediaLibrary Media Manager, and your Media details will now be filled in.
Click the Media's title, and you will be in the Media details edit page. All available Media details will have been retrieved from Amazon (through AWS). Now you can edit the Media's description.
Do not forget to set the Information from: field to On your own.
This will protect your edited entry from being overwritten by new information fetching, which would otherwise be performed at each page refresh.
TIP:
MediaLibrary allows for the use of
external plugins inside the Media
descriptions.
You can use this for a variety of
purposes. We will look at some examples
in a following article.
Save the Media. Repeat for the other newly entered Media.
After saving, you will be returned to the
Media Manager. The new Media will
still be unpublished.
Select the newly entered Media, and click on
the
[Publish] button. That's all for the
ISBN/ASIN Media entry.
In MediaLibrary Shop the affiliate link will be hidden behind the [Buy Now] button in the website frontend. When you hover over it you will only see an internal Joomla URL. Then this URL redirected to the real URL. This also protects the link with affiliateID from being visible to download managers.
TIP:
If you have a lot of Media you need to
enter through ISBN/ASIN, it is much
handier to first look up all ISBN/ASIN,
then create a CSV file and import that.
That procedure will be covered in a next
article under import.